William Wilson
Finally, you can paint the base of your pillow.
Finally, you can paint the base of your pillow.
Storage Planter
This adorable and functional container is a great way to quickly stash those items you require simple access to but do not need cluttering up your room. It's perfect for kids to throw their backpacks when they return from college, or to fall shoes it. Pick a beautiful planter, put a cushioned lid on top, and what's hidden away in a adorable ottoman.

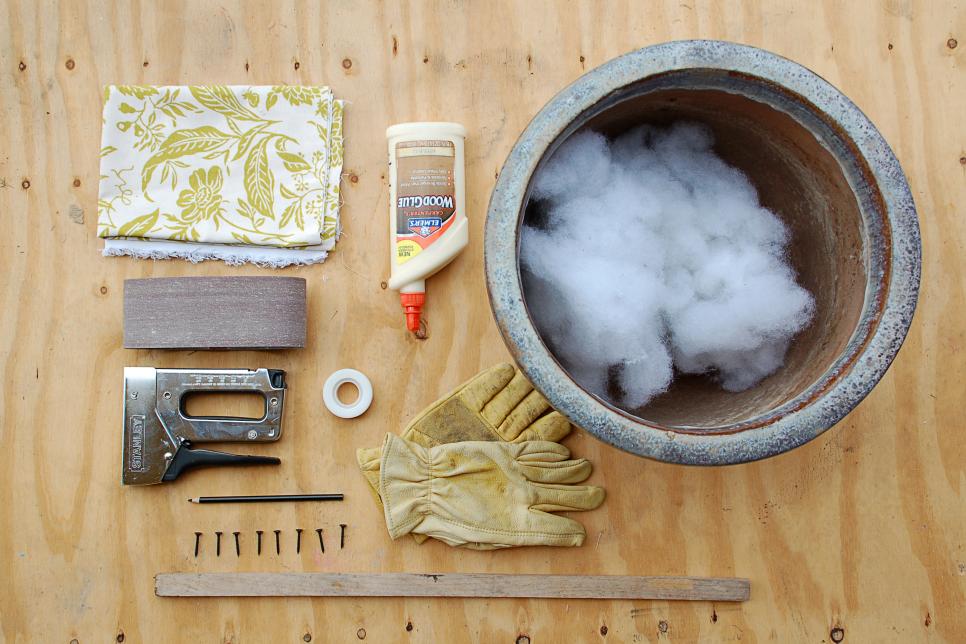
Supplies
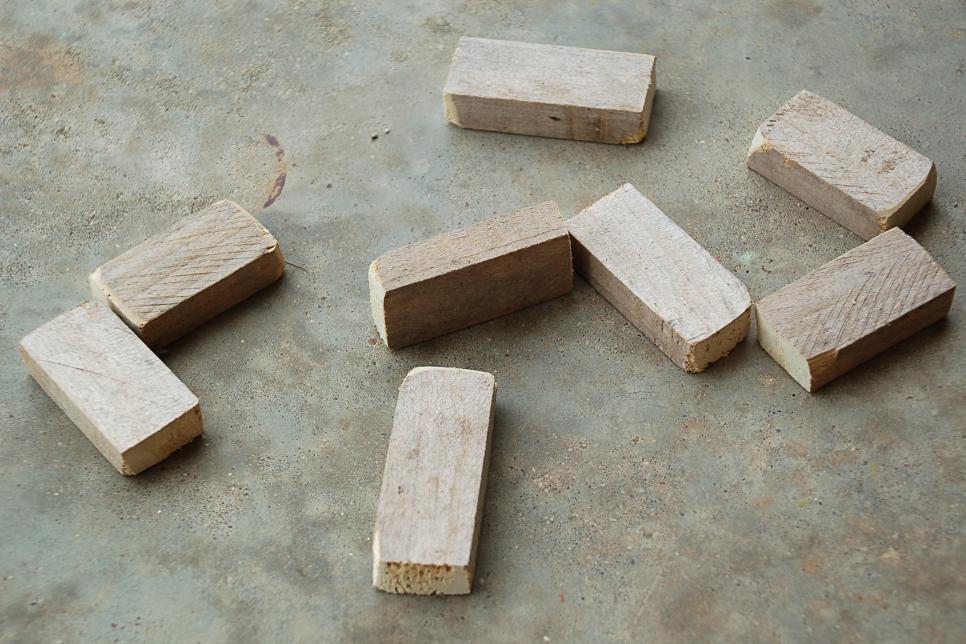
To make your own storage ottoman you will require a large clay planter. It is possible to use a plain terracotta pot if you like, but take the chance to select among these gorgeous glazed ones you've had your eye on. Choose a heavyweight floral cloth in colors that enhance your bud, and stuffing for your own pillow. For the construction of your ottoman cushion you will need plywood tv wall mount toronto . at least 4 ply and big enough to cover the surface of your pot with some overlap, in addition to a narrow plank to produce the lip, approximately 1 inch by half an inch. You will also need wood glue, a fresh roll of tape, a pencil, screws, work gloves, staple gun, power hand saw and sandpaper or power sander.
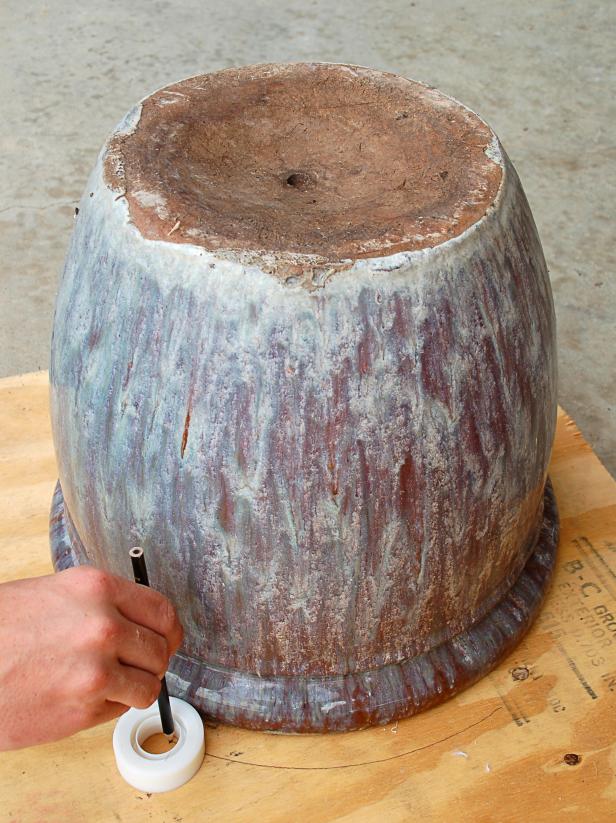
Creating A Guideline
In order to cut a ring out of your plywood, then you will have to first draw out a guideline. To do so, turn the pot upside down and place it to the board. Lay your brand new roll of tape apartment on the board so it touches the edge of the kettle. Place a pencil at the middle of the roll of tape and press it against the edge closest to the pot so you are pushing the roll of tape from the pot. Draw around the pot, allowing the tape roll round the edge as you move the pen. This will give you an even principle of the perfect size and contour.
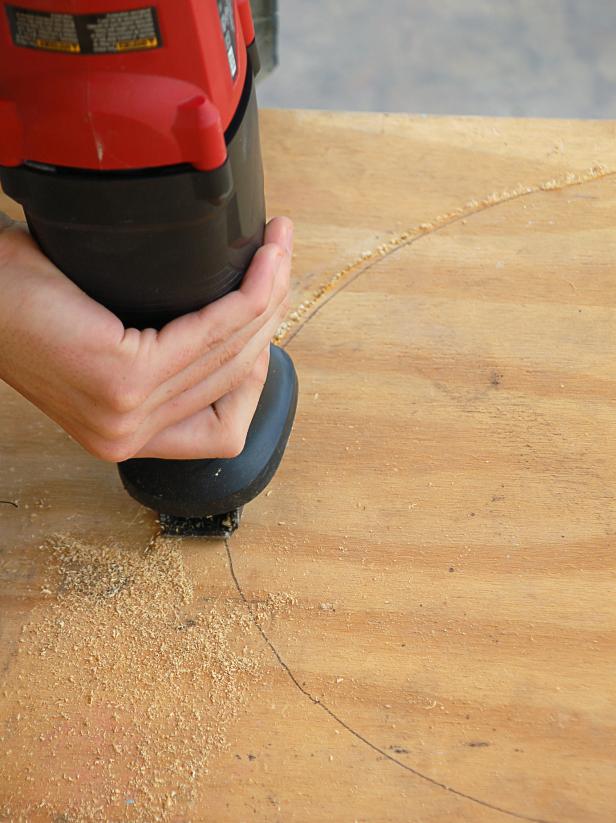
Cutting The Board
A jigsaw works great for cutting the curve required for this project, but you can also use a reciprocating saw. Cut along the outside of the curved line you drew. Err on the side of cutting your circle too big rather than too little. As soon as your circle is cut, sand down any splinters and rough edges. Be sure to wear eye protection while working with power tools, and take all necessary safety precautions.
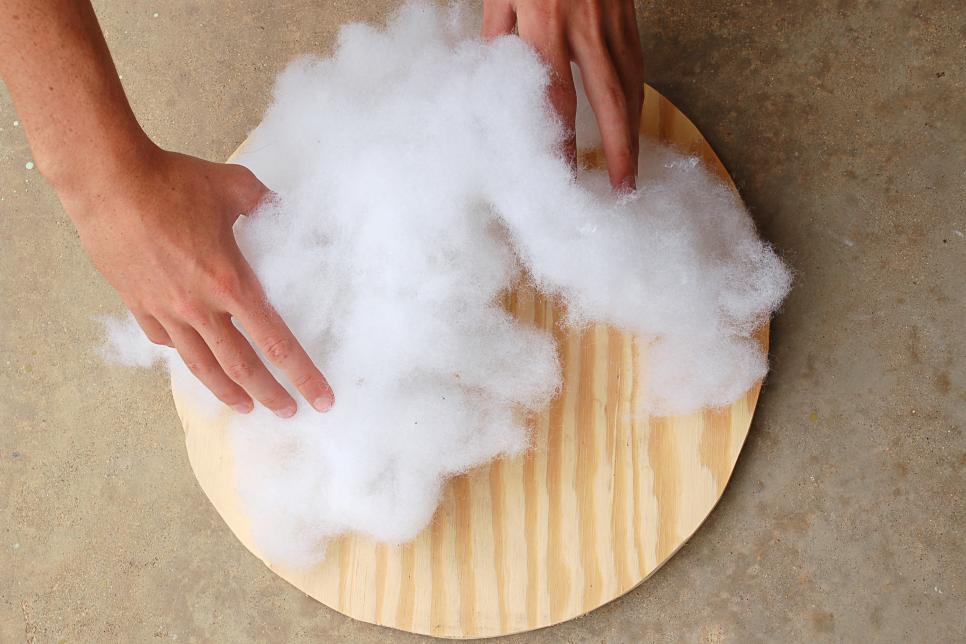
Stuffing The Cushion
You are able to use a variety of different kinds of stuffing for your own pillow. You can cut a piece of thick foam, use polyester stuffing, or recycle the filling from an old pillow or pillow. Use enough to cover the surface of the timber and allow it to be comfortable for sitting.
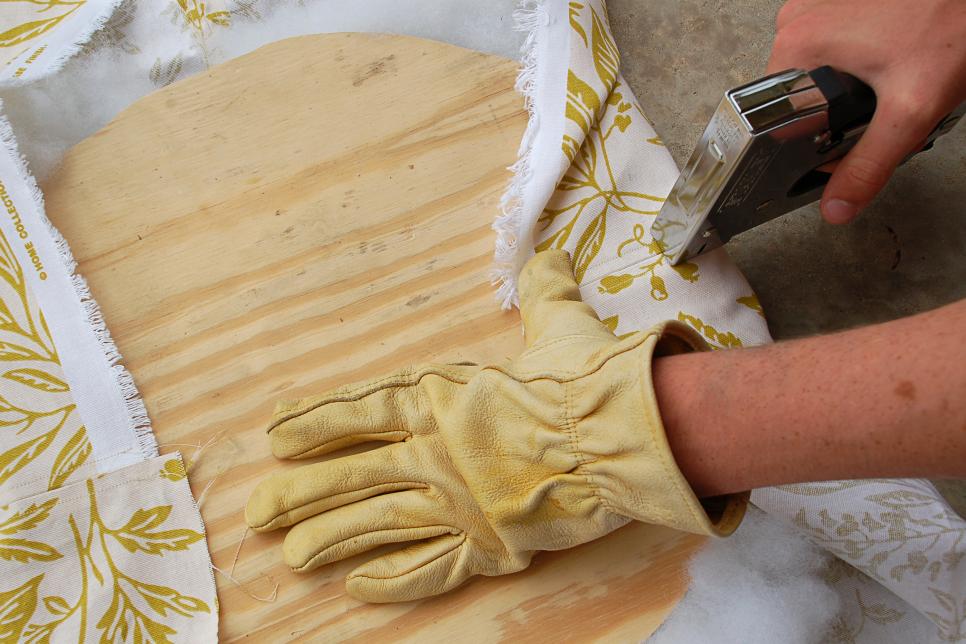
Stretching Fabric
The amount of fabric you will have to pay your pillow depends on the size of pot you are using, but in case you are not sure how much you'll need it's safe to begin with a lawn. You can use just one piece of fabric or cut and resew it to make a decorative effect if you prefer. Cover the stuffing with your fabric, and flip it over so the board is facing upward. Pull 1 edge of the cloth over the back of the board and staple into the board close to the border. Pull the opposite edge of the fabric tight round the board and basic it. Then move a quarter turn to the right and gently stretch and staple the fabric. Proceed to stretch and basic, moving equally back and forth across the circle.
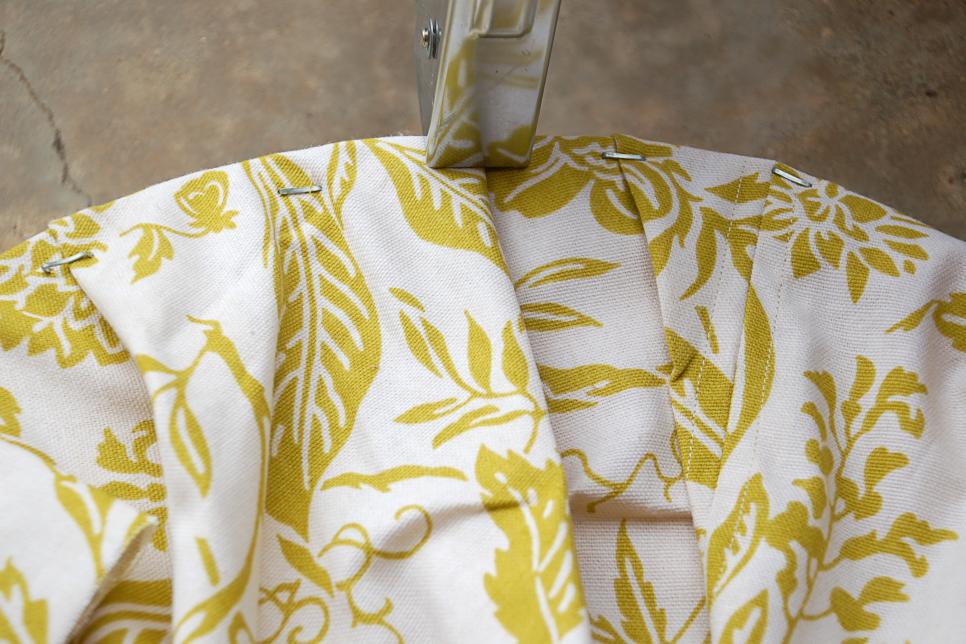
Staples and Glue
As you proceed around the circle you'll have to fold the fabric to help it wrap tightly around the border of the board. Add a bit of wood or multipurpose glue below the edge of the fabric for extra safety before you basic. Glue and staple until the fabric is securely connected to the underside of the board, and no stuffing can leak out.
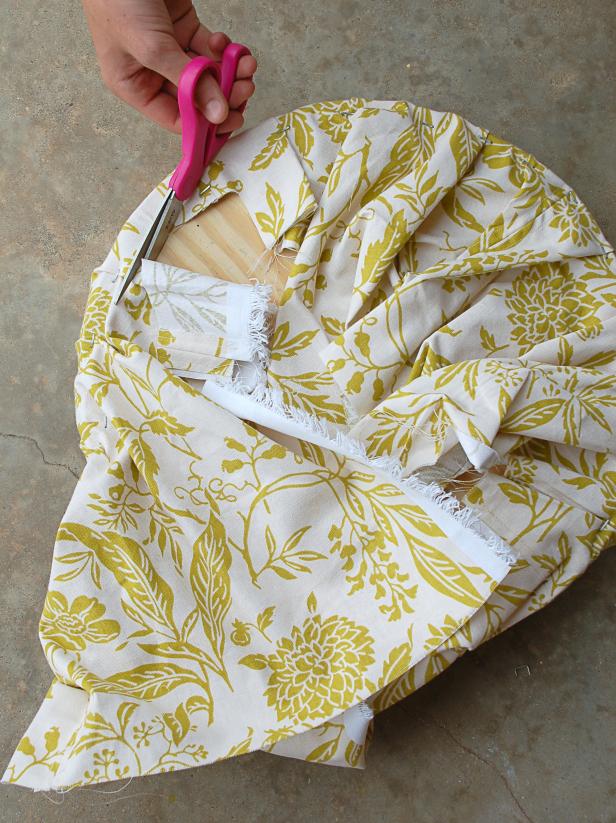
Trimming Fabric
Once your cloth is firmly attached, trim off all of the excess fabric. Use a bit of adhesive along the raw edges to keep the from unraveling, or fold them paste.
Cut Edge Pieces
Now your ottoman pillow is finished you will need to attach extra bits around the edge to keep it from slipping off the cover of the pot. You should use at least eight bits, each about two inches, but you can use more pieces in the event that you would like. Cut them out of your narrow plank and sand down some rough edges.
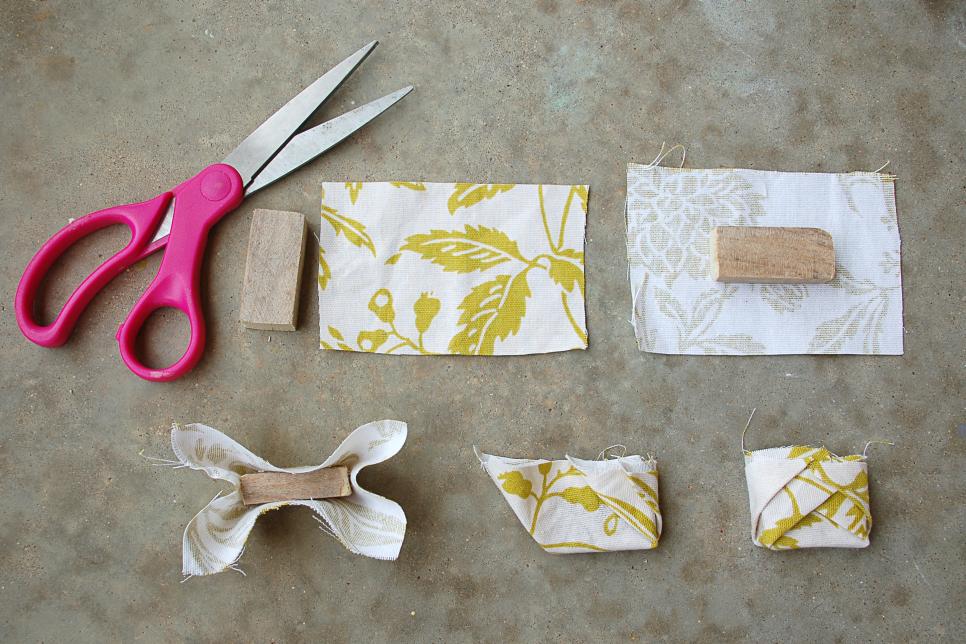
Covering Edge Pieces
Use the extra fabric to cover your little wood pieces. Although you can wrap it any way you prefer, here is a fast way to add an extra decorative touch. Put your wood block in the middle of piece of cloth large enough to fully cover it. Glue one of those long narrow ends in the center of this cloth. Add adhesive to the sides and ends of the block and press on the faces of the fabric up from it to make four corners. Twist these corners one at a time throughout the front and glue to fasten. Then fold the top closed to finish.
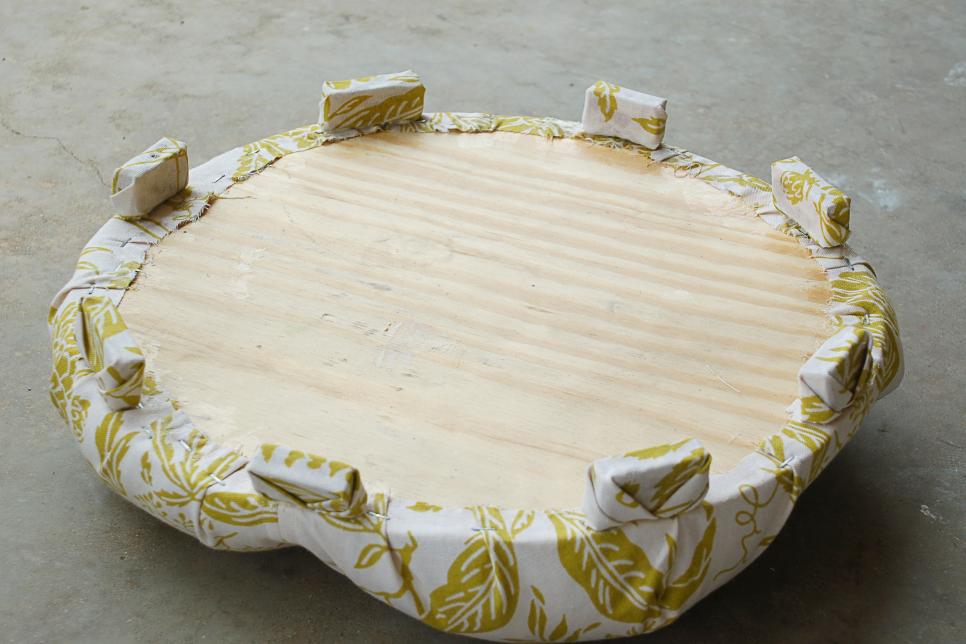
Placing The Edge Pieces
Insert multi-purpose or wood glue to the peak of each of the timber pieces and put them evenly around the edge of the cushion using the ornamental folded side facing outside. Clamp each piece down and allow to dry for at least an hour.
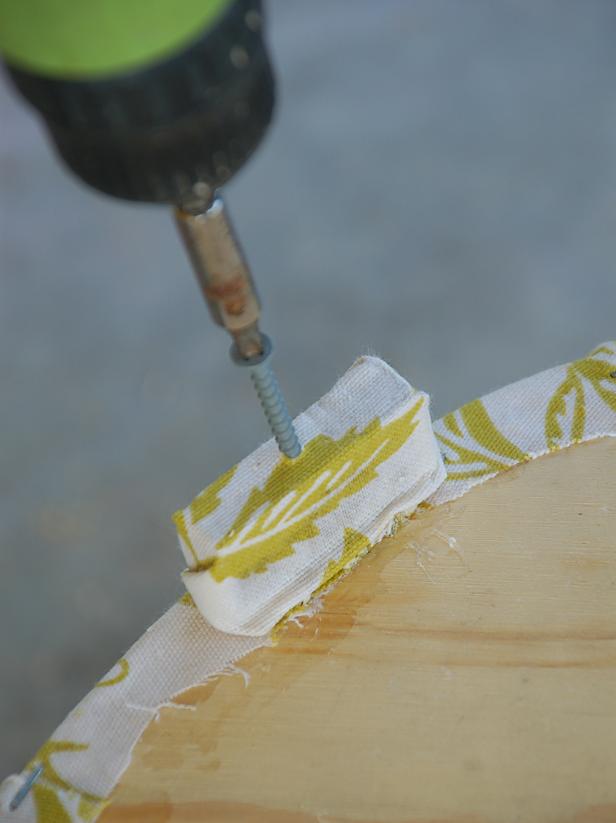
Screwing Pieces Together
After the glue has set, fasten the connection between the edge pieces and the center cushion by screwing them together. You are going to want screws which are long enough to pass through the whole block of timber and to the plywood, but not so long as they move all the way through the plywood. The specific length will depend on what type of plywood you use and how large your blocks are, so measure it out to be sure.
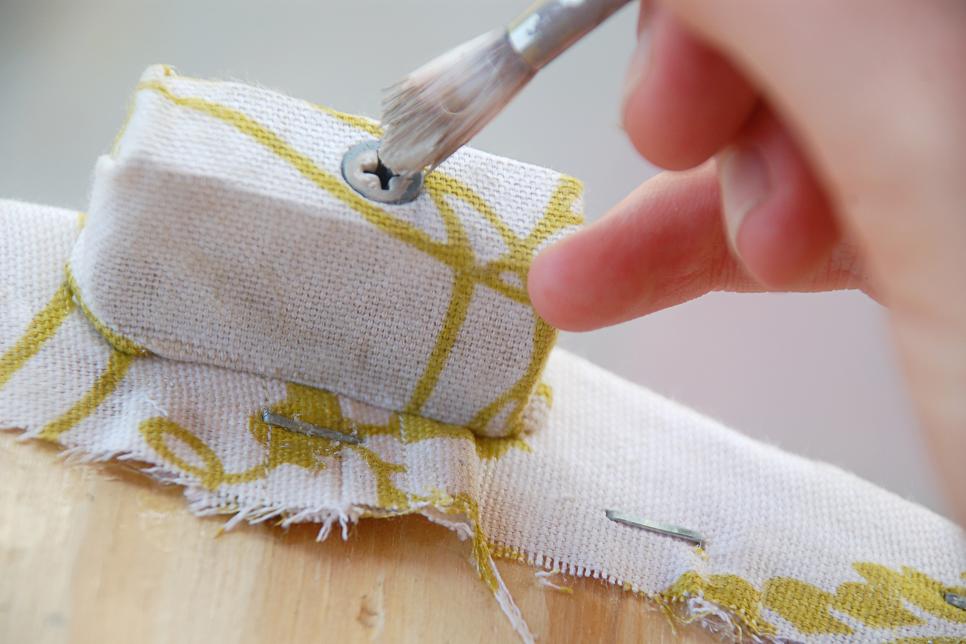
Painting The Screws
Once all your screws are in place you'll be able to paint them to match the background color of this fabric. Even though this isn't necessary, it's a nice touch which makes it look a bit more polished.
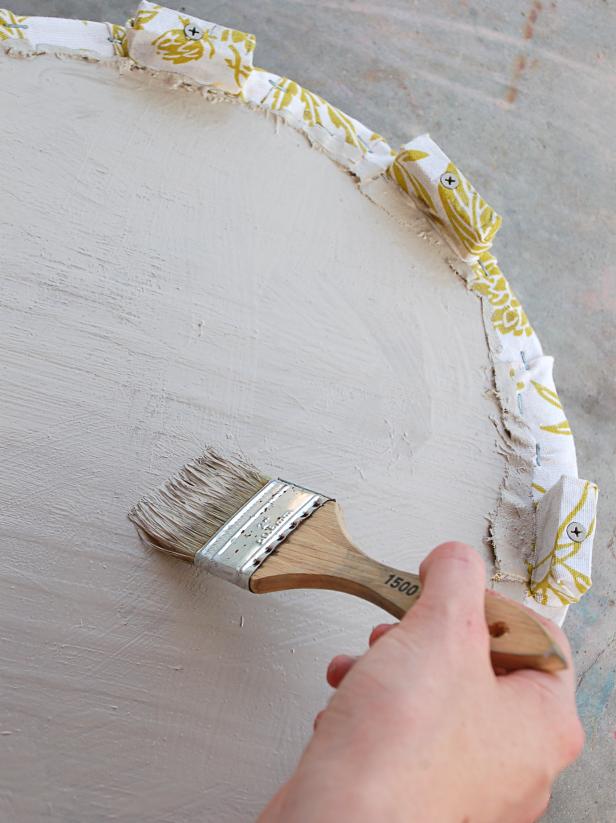
Finishing Touches
Finally, you can paint the base of your pillow. Again, if you aren't worried about anybody visiting the floor, you can skip this step. But if you're going to be raising it and placing things under everyday, the finishing touches can make a difference.
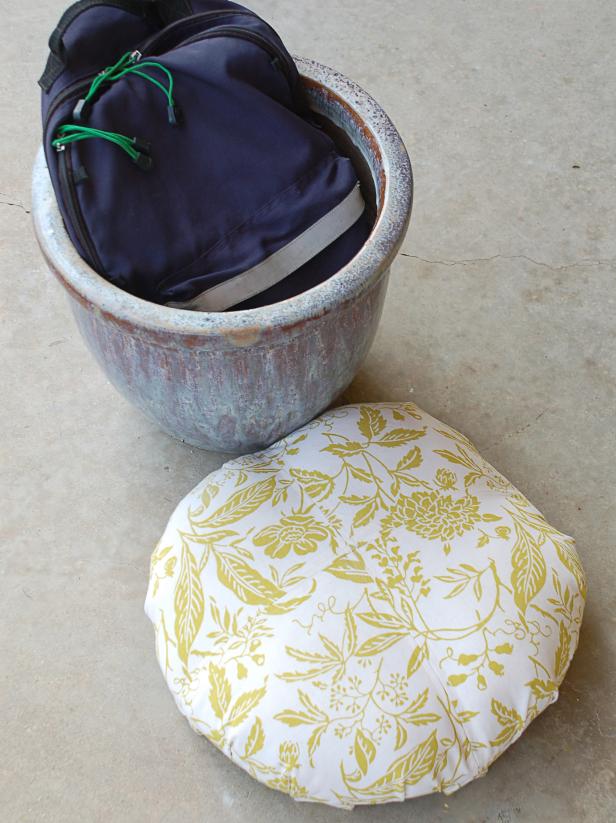
Prepared to Use!
Let the paste in your cushion dry for 24 hours, and it's ready to work with. Place your floral cushion in addition to your planter and envision that those gorgeous flowers are growing out of it! Whenever you need a quick storage space just remove the shirt, throw your things in, and replace the cushion.
This easy technique could be performed in the home in a fraction of the time and utilizes materials that you probably have around the house.
From time to time, the design of your home is the best manual for the style of the furnishings you fill it together; other times, its surroundings will guide you.
The backyard now has the elegance of Tuscany, such as a contemplation garden, an outdoor living space, kitchen and a pool with infinity edges that provide a lake-like feel.
This bachelor pad boasts serious #stairgoals.
The colours find their way on the furniture to create a pulled-together appearance.
This sparkling crown is a stunner, and offers just the subtle hint of glamour that the bride should elevate her wedding-day appearance.
This can help safeguard the surface whilst also adding color and pattern.
To create a tween-height gathering area, think about using a coffee table in the center of this bedroom.
You can never have too much white on your property," he said.
Sculptor Robert Cannon created this abstract bit for a rooftop garden Klausing designed in Brooklyn.
Dark grey wood trim panels above the windows accent the Tudor-style home, while a light grey exterior warms down the lush landscape backdrop.
Send your guests home with a customized playlist filled with your favourite holiday music.
The salute to the couple's heritage.
Fill Mason jars using a layer of chocolate rocks, followed by edible grass, candy eggs and marshmallow bunnies.
This Arts and Crafts style kitchen with Austin Patterson Disston Architects is lavish to say the least.
In 2011, the Williamses replaced the cracked slate tiles with new ones, which have grown a patina that feels in sync with the 82-year-old residence.
Utilize porcelaine paint pencils to create customized mugs for teachers, parents or grandparents.
Colorado Pueblo 81011
(+1) 4168644766
essaicyge1976@gmail.com