William Wilson
Use your creativity and the hints in this gallery to help bring the backyard into the dessert table.
Use your creativity and the hints in this gallery to help bring the backyard into the dessert table.
Garden Cupcakes
Celebrate a special occasion by crafting a cupcake garden! With a small bit of fondant you can transform a typical cupcake to a blooming rose or magical bouquet. Use your creativity and the hints in this gallery to help bring the backyard into the dessert table.

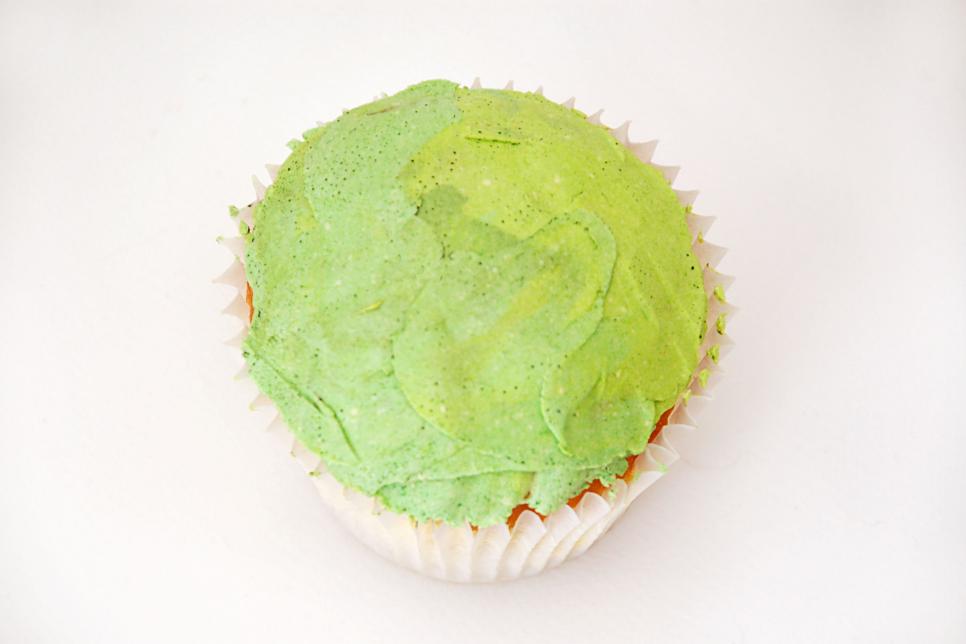
Cupcake Base
To make your cupcake garden the first thing you need is cupcakes! Any flavor or kind will work, choose your favorite. Whenever your cupcakes are cool you will need to give them all a base coat of green, buttercream icing. We suggest starting with a white or pale yellow icing and incorporating just a little bit of food coloring to find the perfect shade of green.
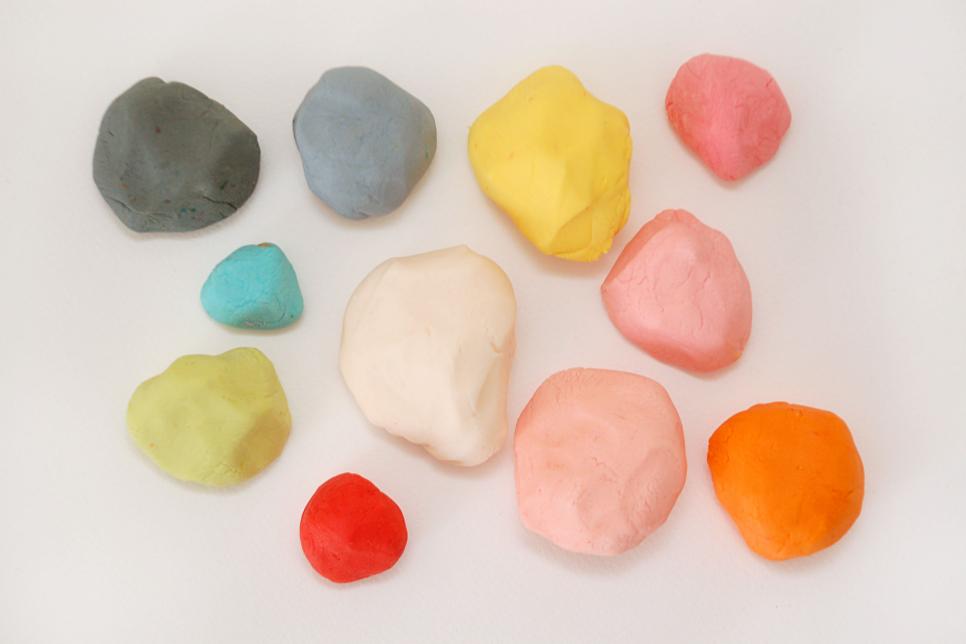
Fondant
Once your cupcakes are iced you'll need some fondant to produce the toppings. You can buy ready-made fondant or use your favorite recipe. Begin with white fondant and add a few drops of food coloring to get your preferred color. You may make as many or as few colours as you would like, we utilized pink, green, white tv bracket installation services . orange, red, yellow and grey for ours. Knead the fondant before the color is dispersed throughout. If you find that the fondant becomes too sticky at any stage just knead in a bit of powdered sugar. If you have to save some fondant for a day or two, wrap it with plastic wrap and store in the refrigerator.
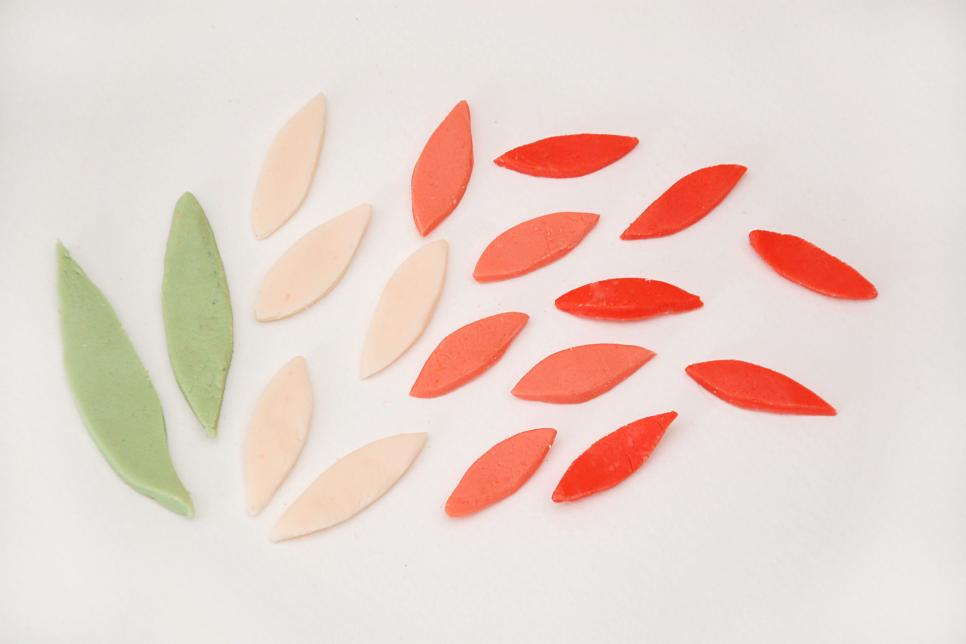
Straightforward Petals
Produce these simple petal shapes by rolling out a sheet of fondant, about an eighth of an inch thick. Use a cookie cutter or sharp kitchen knife to cut a series of narrow petal shapes. The amount of petals you will need will be based on the size of your cupcake and how complete your want your flower to be.
Laying on Petals
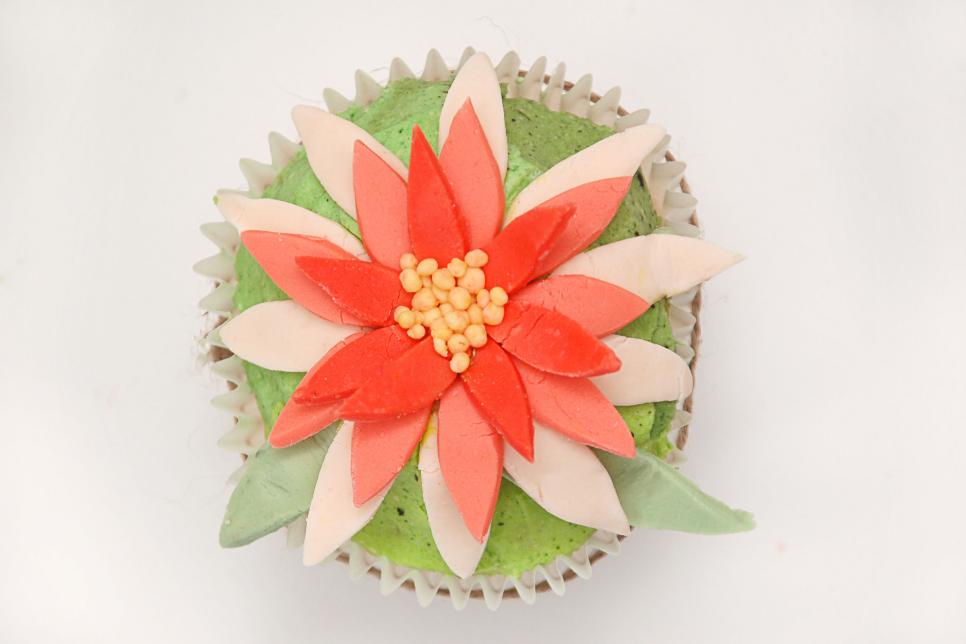
We used 10 light pink petals, 9 dark pink shades and 7 red petals for this flower. Simply lay down them coating, pressing them into the icing at the middle. Finish by placing a couple little chunks of jelqing in the center or utilize a dollop of icing covered in dragee sprinkles (the large round ones).
Including a Ladybug
You can use the same simple petal technique in a completely new manner by turning your petals into leaves and including a ladybug. To create a lady bug, roll a bit of red fondant in an oval shape. Produce a smaller gray oval for the head and little dots of gray for your ladybug's spots.

Ladybug and Leaves
Cut your petal shapes from green fondant rather than pink and layer the leaves up. Place all your lady bug pieces together and set the ladybug at the middle. If your fondant becomes too dry and doesn't want to adhere, brush a very small bit of water on or use sandpaper to maintain the pieces together.

Little Flowers
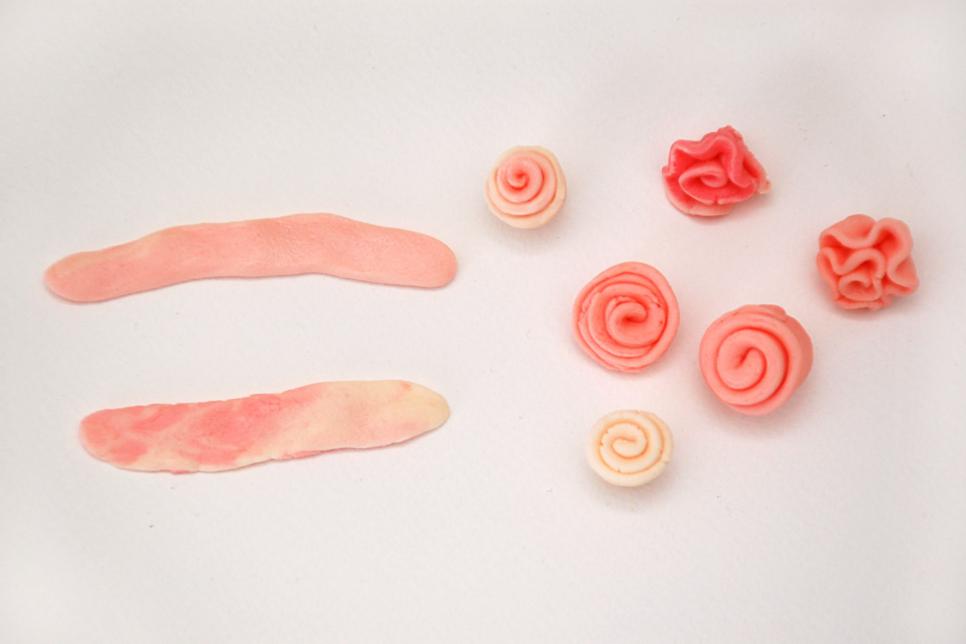
Rolling fondant into spirals is another simple method to produce edible flowers. Roll a sheet out of paper and cut or tear long strips out of it. Roll up the strands to create tight spiral roses. You can even try rolling out the strips more loosely to make the effect of ruffled petals. Try marbling two different colors together at a strip to make a variegated effect in your blossoms. Simply knead to colors together, stopping before they blend completely.
Arranging Rolled Roses
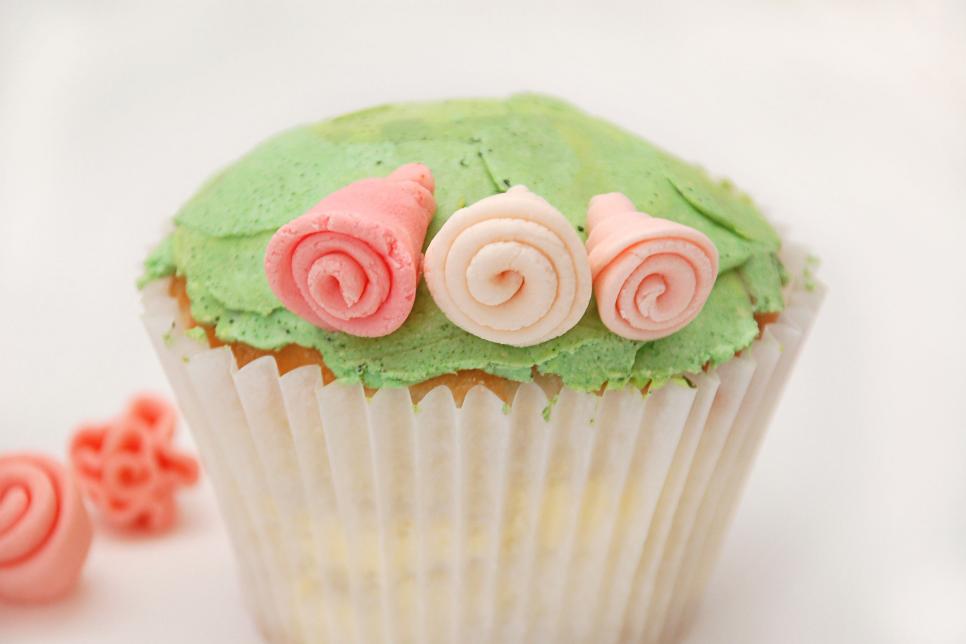
Arrange the flowers by placing a ring around the outside border of the cupcake, with the top of the blossom facing outside. Try mixing different colors and colors together.
Completed Bouquet
As soon as you have the base ring, then stack more blossoms on top till you've covered the whole surface of the cupcake. Form little foliage shapes with your palms and put them in any gaps between the flowers. Use a small bit of water or icing if required to aid things stick.

Large Rose Petals
It's possible to produce a massive rose by tearing larger strips from a sheet of fondant and using them to form petals rather than a whole flower. Do not worry if your strands are irregular, it will create the petals appear more natural when you put them together.

Placing the Rose
Start by creating a little wrapped rose for the centre. Build up the blossom by wrap more bits of fondant around the center. Allow the fondant fold or tear if it needs to; your flower will look more organic if it's not entirely perfect.

Finished Rose
Continue adding petals until the entire top of the cupcake is covered. If it seems too flat, give the petals more body by including a fold or ripple as your wrapping them about.

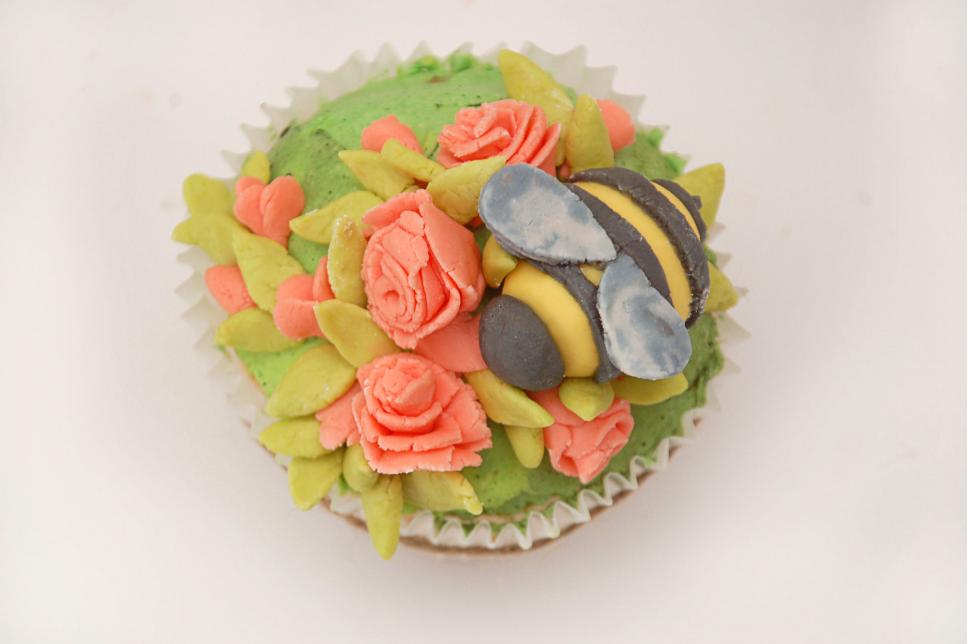
Bumble Bee
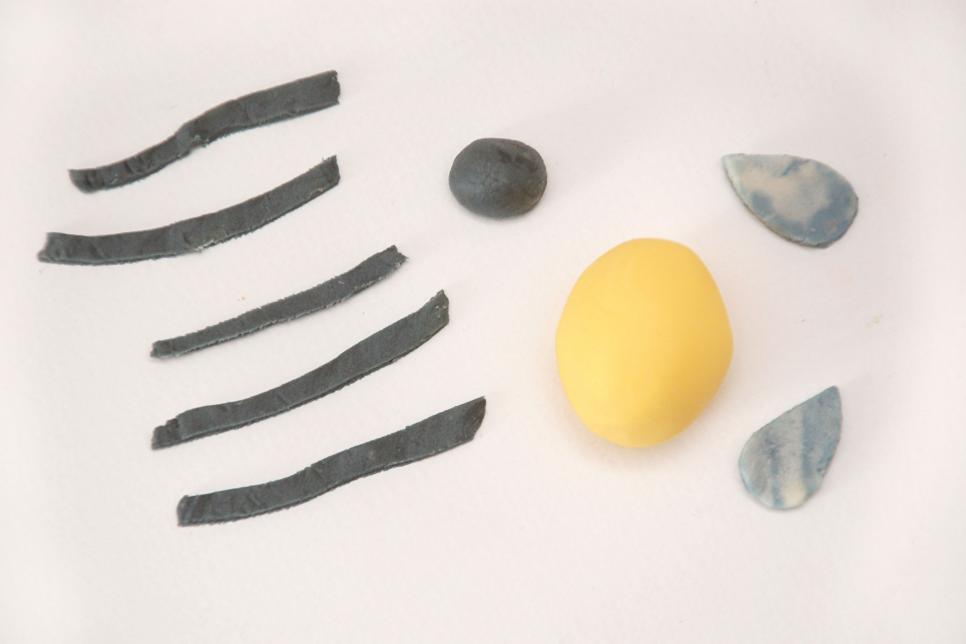
You might even create smaller flowers utilizing the same technique you use for the significant rose, but using small flowers you can leave room for a bee! Begin with the same shapes you would use for the ladybug, a yellowish oval to your body and smaller grey oval for the head. Cut stripes out of a sheet of grey fondant and small wings from a sheet of marbleized white and blue.
Bee in the Roses
Top a cupcake with a string of smaller roses and set the bee one of them. You are able to combine techniques for roses with several petals and cherry roses to produce complete buds and flowers. Add a few leaves to fill in the surrounding area.
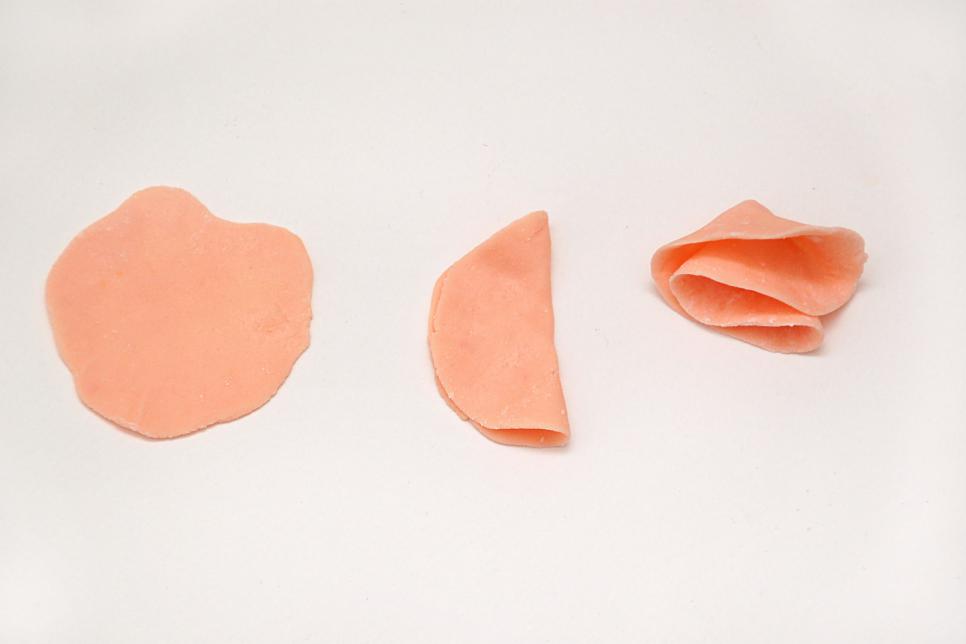
Folded Petals
You may create beautiful and very round blossoms by simply folding a couple of pieces of fondant. Roll a sheet of paper in your desired color and cut out circles out of it. You can use a cookie cutter to acquire best circles, but we cut pristine circles freehand. Cutting circles which aren't quite perfect will give your petals more variety and create the final blossom more organic. Instantly fold your circles into quarters that are loose. If the fondant gets too dry before folding it's going to crack.
Arranging the Petals
Put your loosely folded petals in a ring around your cupcake together with all the folded corners pointing. Add another layer of petals in addition to these, all the way round. Now you can choose if you would like to finish out the flower or put in a butterfly.

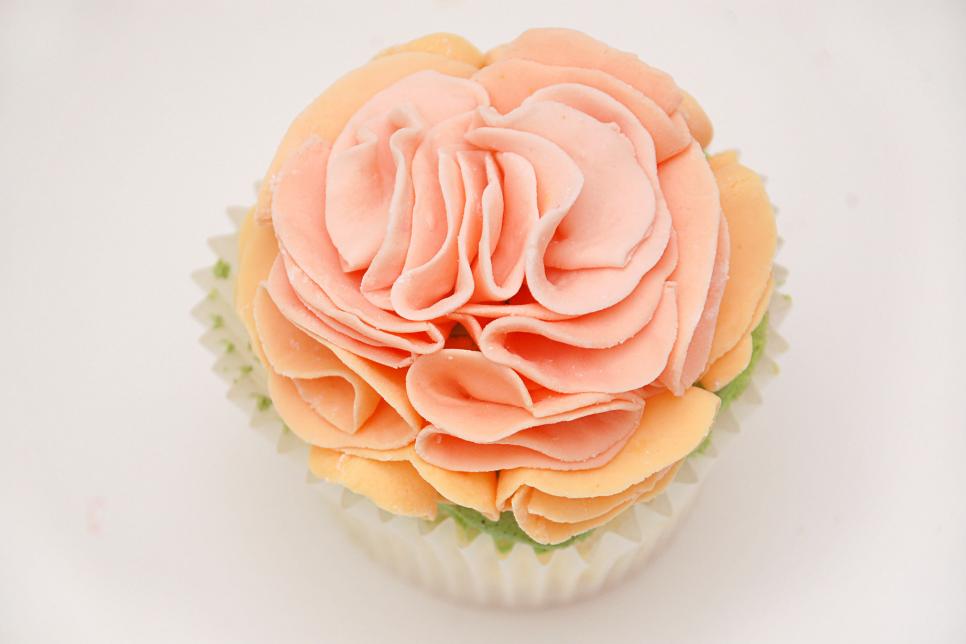
Finished blossom
To finish the flower simply continue incorporating layers of petals until the center is full and the cupcake is coated. We used a gradation of colours for ours, starting with cherry blossom on the bottom and moving to light pink in the center. This is one of the quickest ways to construct fondant flowers.
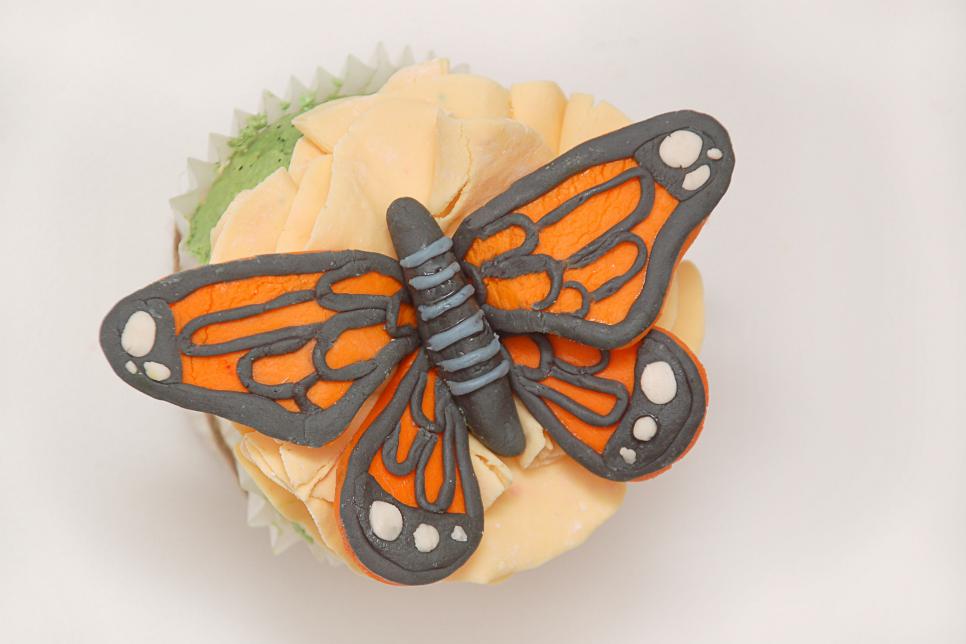
Butterfly Shapes
Rather than completing the whole flower with petals, you can top your cupcake with a beautiful butterfly. To make our monarch butterfly we cut wing shapes from a sheet of orange fondant. (If you are concerned about getting the shape right, consider tracing a photo.) We also utilized a fat gray log contour for the human body and lots of little ropes for stripes. A few white circles are ideal highlights.

Finishing the Butterfly
Placing all of the butterfly bits together can be tricky, but plenty of fun! If you're going for a particular butterfly make certain to look at a photo for just a little guidance. Trace the outside of the butterfly's wings in black and also fill the inside by creating loops with all the thin grey rope. Add white spots to the ends of the wings and grey stripes into the entire body for a perfect finishing touch! You are able to create any type of butterfly this way, simply change the color and wing shape.
Done!
You can now organize and serve your beautiful cupcakes. Even though these cupcakes are not too tough to make, they do require a good deal of time. If you are going to make a bunch make certain to do a couple tests beforehand so you can plan accordingly.

This easy technique could be performed in the home in a fraction of the time and utilizes materials that you probably have around the house.
From time to time, the design of your home is the best manual for the style of the furnishings you fill it together; other times, its surroundings will guide you.
The backyard now has the elegance of Tuscany, such as a contemplation garden, an outdoor living space, kitchen and a pool with infinity edges that provide a lake-like feel.
This bachelor pad boasts serious #stairgoals.
The colours find their way on the furniture to create a pulled-together appearance.
This sparkling crown is a stunner, and offers just the subtle hint of glamour that the bride should elevate her wedding-day appearance.
This can help safeguard the surface whilst also adding color and pattern.
To create a tween-height gathering area, think about using a coffee table in the center of this bedroom.
You can never have too much white on your property," he said.
Sculptor Robert Cannon created this abstract bit for a rooftop garden Klausing designed in Brooklyn.
Dark grey wood trim panels above the windows accent the Tudor-style home, while a light grey exterior warms down the lush landscape backdrop.
Send your guests home with a customized playlist filled with your favourite holiday music.
The salute to the couple's heritage.
Fill Mason jars using a layer of chocolate rocks, followed by edible grass, candy eggs and marshmallow bunnies.
This Arts and Crafts style kitchen with Austin Patterson Disston Architects is lavish to say the least.
In 2011, the Williamses replaced the cracked slate tiles with new ones, which have grown a patina that feels in sync with the 82-year-old residence.
Utilize porcelaine paint pencils to create customized mugs for teachers, parents or grandparents.
Insert multi-purpose or wood glue to the peak of each of the timber pieces and put them evenly around the edge of the cushion using the ornamental folded side facing outside.
When looking for things to decorate your bedroom, designer Jessica McKay suggests searching for pieces you already own and transforming them into something fresh.
Designer Allison Rejeanne desires this dwelling room/entryway to incorporate a wavy, oceanic texture through its architectural and decorative details.
Narrow your search to drum colors.
Elegant touches of purple were inserted to Madeline's space through classic glass bottles exhibited on white floating shelves, placed closely up high and out of reach.
Kim added printable greeting labels at every place setting for the perfect finishing touch.
You can probably buy a holiday candle in pretty much every odor imaginable but that does not mean you should.
Learn to create these shoes on Design Happens.
The local brew pubs and taprooms are also a popular draw.
You are able to view every knot in the Brazilian hardwood dining table.
This look is inspired by the sea.
This cluttered kitchen will not only receive a makeover, it will be totally relocated.
I then start pulling out things that I have in my stash to see what I could utilize.
And abandoned tunnels have been transformed into wine cellars that could accommodate over 600 wine bottles -- also as guests for private, candlelit dinners.
The fashionista and television character's Spanish-style house was featured on MTV's The Hills.
Giant Jenga leads to ginormous fun.
Toughened (or tempered) glass provides an superb work surface, and the drawers, previously employed for storing gloves, scarves and hats, provide exceptional space to accommodate and display treasured crockery and table linens," states Walesch.
This kitchen, designed by architect Kurt Worthington and interior designer Susan Diana Harris, welcomes guests of all ages.
A funky, young fall touch is added to the outdoor area by mixing strong pops of orange with contemporary furnishings.
Decide the placement of the biggest items first, then fill with smaller pieces.
Ford graduated with a Bachelor of Arts in Economics from Michigan in 1935.
On a daily basis, both Felix and Reyn are available drawing and painting in the basement.
Specialty food channels create chatter among guests and serve as a excellent way to spark conversation for people who haven't met.
Colorado Pueblo 81011
(+1) 4168870387
essaicyge1976@gmail.com